For the new versions of S4 HANA , if we try to run LTMC system throws the below error

Try to open the app
Sometimes there is a issue with the configuration of front end system and it is not possible to execute the app Migration Cockpit to SAP S/4HANA on S4 HANA.
The Error description is below
“Cannot create project. Certain settings are required before projects can be created. Contact SAP for support by creating a ticket using component CA-LT-MC”
or system might throw below error message as soon as you click on the app “Migrate Your Data – Migration Cockpit”
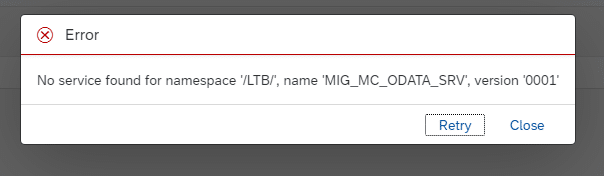
This error happens due to missing of odata service “MIG_MC_ODATA_SRV”
Table of Contents
1. Service “MIG_MC_ODATA_SRV”
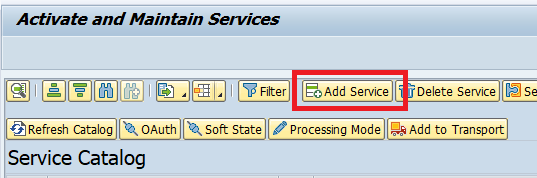
Now we will add the required Odata service “MIG_MC_ODATA_SRV” to resolve this error
1.1 Transaction – “/n/IWFND/MAINT_SERVICE”
Run the transaction /n/IWFND/MAINT_SERVICE
Click on “Add Service” as shown in the below screenshot
Select
System Alias “Local”
External Service “MIG_MC_ODATA_SRV”
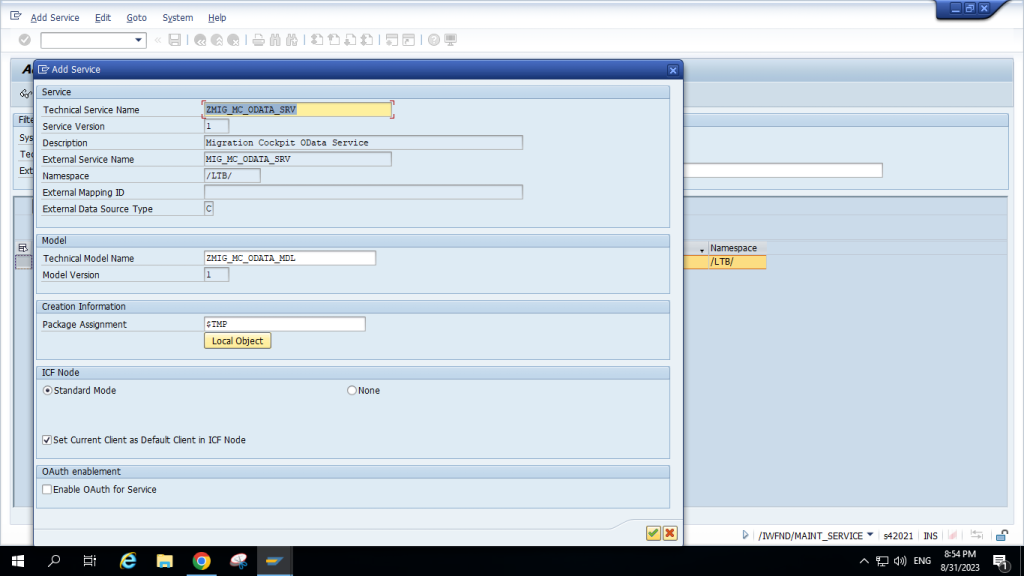
And select the package assignment as “$TEMP”
The Odata service is not configured correctly and we can start running the app sucessfully
Go to app and below page will be displayed
2. Loading of GL master data
We will load GL master data using the app “Migrate Your Data – Migration Cockpit to SAP S/4HANA”
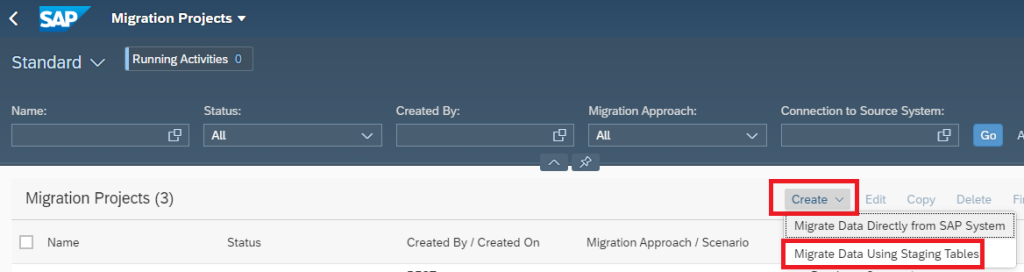
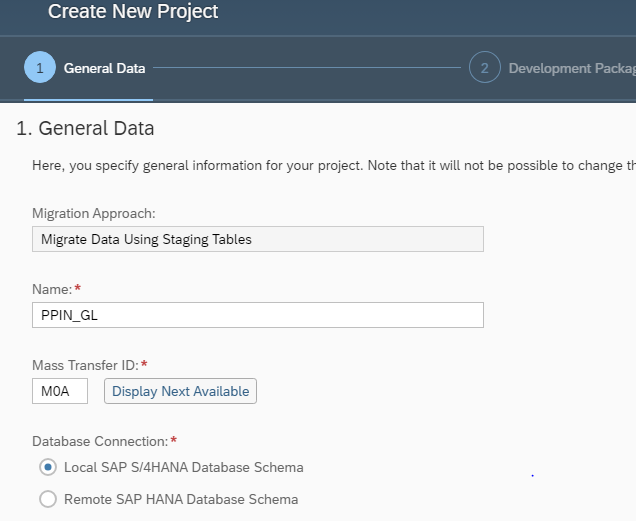
2.1 Project Creation
Create the project as shown in the below screenshot
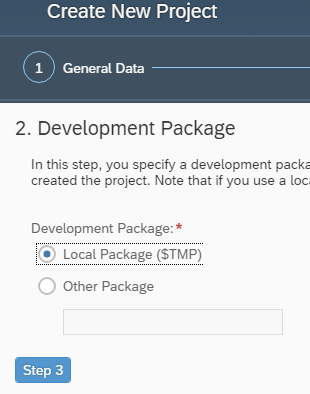
click on “Step 2”
Select “Local Package” and click on Step 3
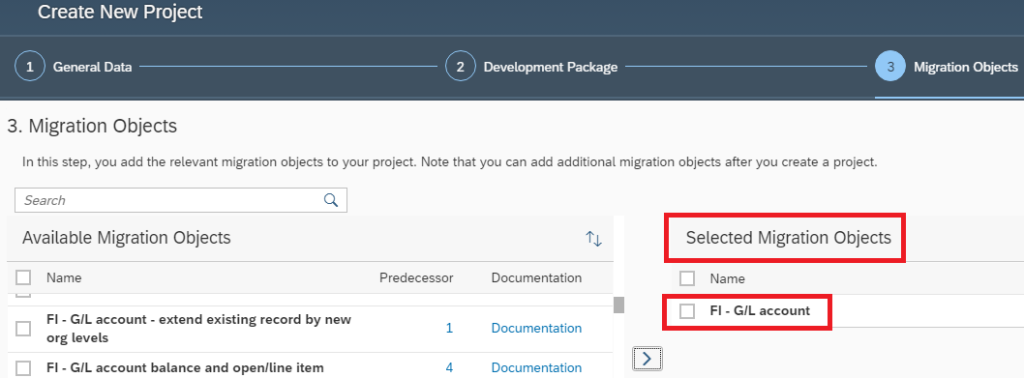
Select migration object as “FI-G/L account” as shown in the below screenshot
Now click on “Create Project”
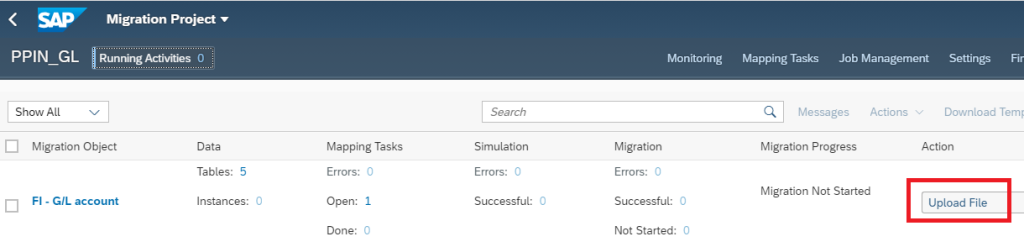
Project is created successfully

2.2 Upload the completed Master Data file
Now select your project and upload the file
Note : you can download the template and fill your data. For this GL master data load project you can download the completed file in format from HERE.
You need to convert the file in XML format before uploading. You can download the completed file converted in XML and ready for upload for our car business GL accounts from HERE
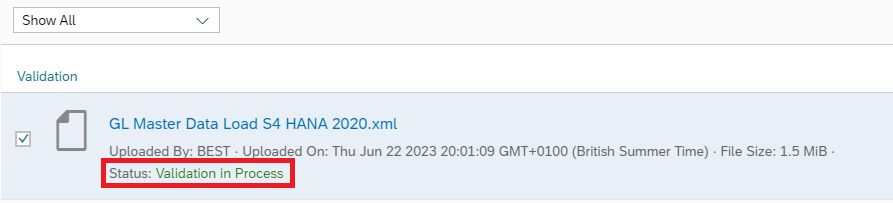
2.3 Validations
Now system will run the validations and give the error/warning accordingly
2.4 Transfer Data to Staging Table
We will now transfer data to the staging tables.
Please click on “Transfer Data to Staging Table” as shown in the below screenshot


2.5 Preparing
Staging tables needs to be prepared before mapping and data transfer
Click on Prepare to start preparing the staging tables.

2.6 Mapping
Now system will present the different mappings between configured values and what loaded in the master
Click on “Mapping Tasks”
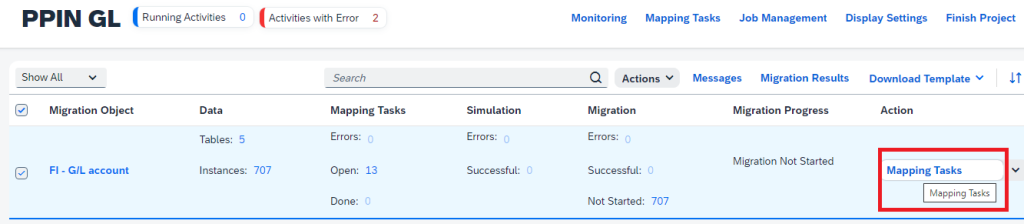
In our master data , system has presented 13 mapping tasks
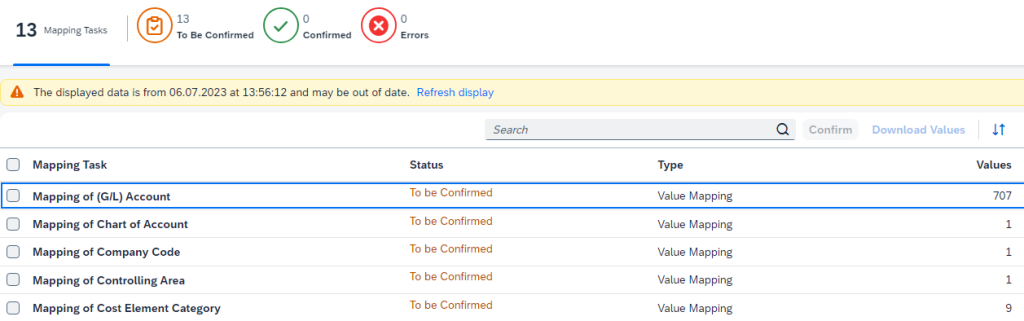
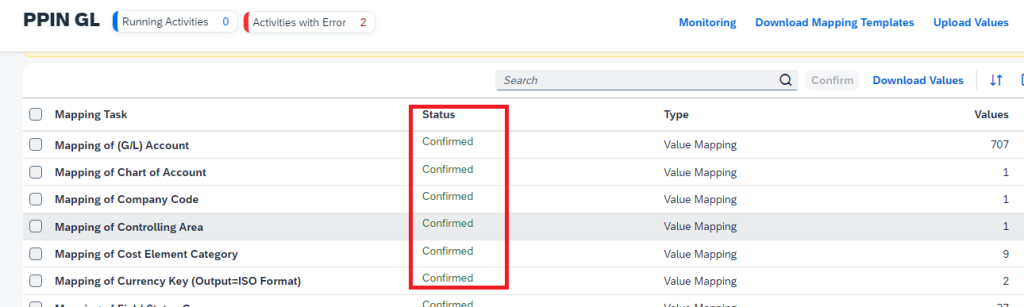
We have now confirmed all the 13 mapping tasks one by one
2.7 Simulation
Once mapping tasks are confirmed, system will present the simulation “Option”

2.8 Data Load
Now data load will start.
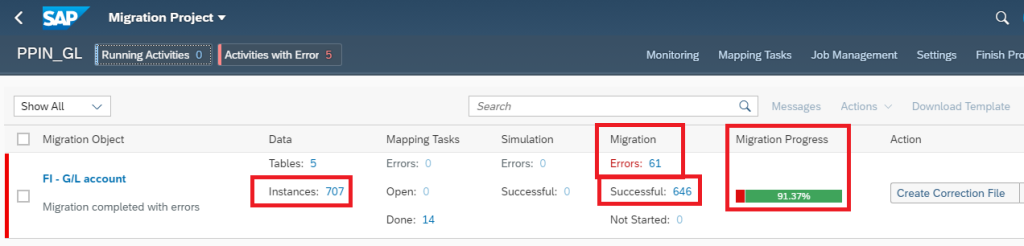
2.9 Migration Result
System will show the result in the form of error & successful
3. Error Correction
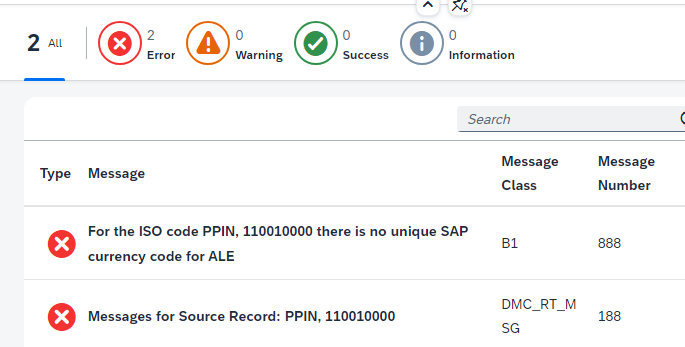
In our project of GL master data load there are total 61 errors as per the migration result
System has the provision of download only error records and work on them.
Let’s download the records in error in the format, correct them and reload.
3.1 Create correction file
Click on “create correction file” option. Check the screenshot in the above section.

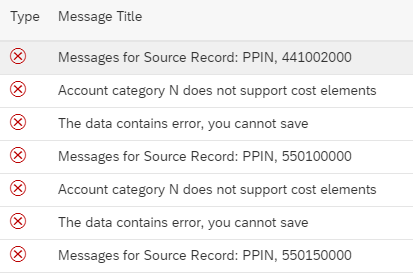
also check error messages to know what went wrong.

We can see the errors now
3.1.1 Error 1
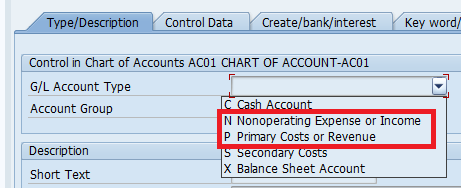
The first error is “Account category N does not support cost elements”
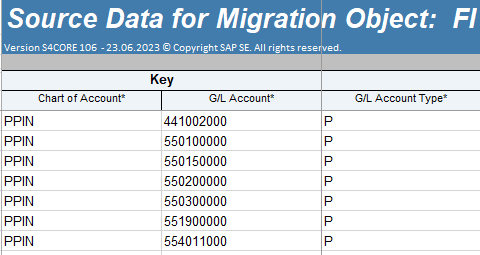
Check our data file. We have marked these GL in error as Account type “N” incorrectly
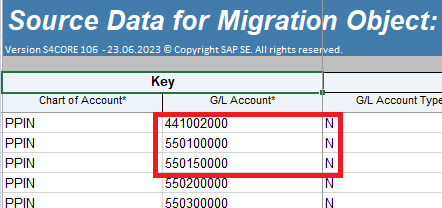
These account should be “P” type instead of “N” type
We have corrected these accounts from “N” to “P”
3.1.2 Error 2
The second error is related to a missing configuration.
Let’s go to configuration
The path for this configuration is given below
SPRO –> Financial Accounting –> Financial Accounting Global Settings –> Ledgers –> Fields –> Define Field Status Variants
Select Field status variant “010” and click on “Field Status Groups”
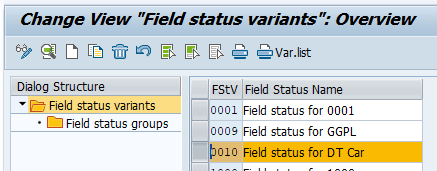
Add “SEC0” and save
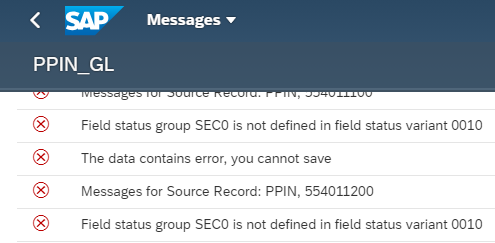
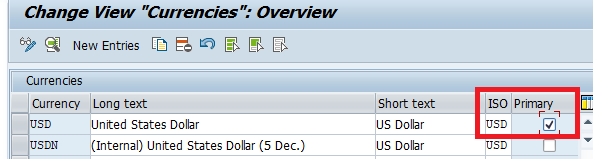
3.1.3 Error 3
The another error which we can encounter is given below
Resolution
Go to Code OY03 and there are two entries for “USD”.
Declare one of the entry as primary
4. Upload the corrected file
We have corrected file now. Upload the same

System will do the validation again and data is transferred to the staging table

Now we have simulated and ,migrated all the corrected records to S4 HANA successfully